Sunday, May 29, 2011

Baking the weekend away

So maybe you live somewhere like I do. Somewhere that seems to think it's February, not May.. nearly June. We're enjoying our Memorial Day weekend inside. What do I do during a three day weekend when I'm stuck inside? Bake.
I've got a scrumptious loaf of streusel topped banana bread in the oven as we speak (type, read?).

Photo from Allrecipes.com
In case banana bread isn't your thing, I've taken the liberty to dig up some other tasty treats. Let the drooling commence!
Chocolate Hazelnut Biscotti recipe courtesy of joyofbaking.com

Strawberry Shortcake recipe courtesy of Nigella Lawson

Honey Wheat Loaf recipe courtesy of thefreshloaf.com

Now go bake up something tasty!

Friday, April 29, 2011

The Perfect Breakfast Cookie


These are the best breakfast cookies. They're hearty and full of yummy AND healthy ingredients. I baked up a batch a few days ago and they're already gone. Definitely not just a breakfast 'breakfast' cookie! 


Recipe adapted from Simple Nourished Living.

Peanut Butter Breakfast Cookies

Makes about 2 dozen


Ingredients
1/2 cup butter, softened
1 cup peanut butter ( substitute sunbutter if you can't do nuts!)
1 cup packed brown sugar
3 teaspoons vanilla extract
2 large eggs
1/3 cup water
1 cup all-purpose flour
1 cup whole wheat flour
2 cups quick cooking oats
1/2 cup wheat germ
1 teaspoon salt
1 teaspoon ground cinnamon
2 teaspoons baking soda
1 cup dried fruit ( I used cranberries and they were uber tasty!)

Sprinkles of raw sugar

Preparation


Preheat oven to 350F degrees. Line baking sheets with parchment paper or lightly grease them.
In a large bowl beat together butter, peanut butter, brown sugar, and vanilla with an electric mixer until creamy. Beat in eggs and water.
In a medium bowl stir together flours, oats, wheat germ, salt, cinnamon, and baking soda. Mix flour mixture into peanut butter mixture. Stir in dried fruit.
Drop by ice cream scoopfuls (or 1/4 cup measuring cupfuls )2 1/2 inches apart on greased cookie sheets. Flatten slightly. Sprinkle raw sugar on top.
Bake for 18 to 20 minutes until golden but still soft.
Remove from the oven and cool on cookie sheet for 2 minutes, then transfer to cooling racks to cool completely


Monday, April 4, 2011

Chocolate Texas Sheet Cake- A Guest Post from Sweet Butter Bliss

Today we have a guest post from the lovely Anastasia of Sweet Butter Bliss (I mean, just the name of her blog... how could she be anything but lovely!)

Jen asked me to do a guest post and since I think she's fantastic I readily agreed. Too bad life wouldn't play along, the kids were sick, I got sick, then the hubs got sick. My father in law was in the hospital! Friend drama and kid drama. Basically life transpiring against me.  Jen had originally asked me to do some sort of healthy recipe. But after all that I was ready for some chocolate cake. So I am making some mental health food. Chocolate Texas Sheet Cake. Oh so good!

The recipe:

FOR THE CAKE:
2 cups Flour
2 cups Sugar
¼ teaspoons Salt
4 Tablespoons (heaping) Cocoa
2 sticks Butter
1 cup Boiling Water
½ cups Buttermilk
2 whole Beaten Eggs
1 teaspoon Baking Soda
1 teaspoon Vanilla


FOR FROSTING:
4 Tablespoons (heaping) Cocoa
6 Tablespoons Milk
1 teaspoon Vanilla
1 pound (minus 1/2 Cup) Powdered Sugar

The How to:
Your first step is to ignore my dirty kitchen. I don't clean before chocolate cake. Only after. Sometimes.


Enjoy today and get back on the wagon tomorrow.  Maybe.

Please visit me at Sweetbutterbliss, where I'm always hungry, especially for chocolate cake. 

-Anastasia @ Sweet Butter Bliss

Sunday, March 13, 2011

Citrus Salt Scrub

Hey guys! It's been WAY too long. I'm sorry for leaving you all hanging in the wind. Life's been busy-- however, I've not stopped creating, just stopped sharing. So-- it's time. Here I am, sharing my latest little creation.
A lovely salt scrub. Winter's on it's way out, and Spring is blooming ( Hopefully for you too! )Which only means, we need to ready our pasty skin for that sun! Time to get the dry flaky skin off, paint those toenails and get ready for flip-flips. I'm more than ready for the change in the season-- So, I decided this morning, I need a new scrub ( I LOVE them! ) So, here we are. This recipe is SO easy, and you likely have all the ingredients to make it happen already. It took me about 10 minutes tops.
Here's the digs on this super scrub:

Ingredients:

1/2 cup sea salt
1/2 cup sweet almond oil
(can substitute light olive oil or vegetable oil)
1/2 teaspoon lemon zest
1/2 teaspoon orange zest

Directions

In a medium dry bowl, combine all ingredients making sure to not let any water touch them as it will dissolve the salt. Pour mixture into an airtight container and store in a cool dry place.
To use: Just before showering, swirl ingredients together with your fingertips to mix. Clean body completely and just before exiting shower, apply Citrus Salt Body Scrub to body in a firm circular scrubbing motion with hands or a soft washcloth. Rinse off the mixture and pat body dry with a clean towel.
I used a small mason jar, tied a little ribbon around it, and viola-- a perfect gift! (Although, this one is ALL mine!) How's that for easy-peasy? I thought so. 
Welcome Spring with your soft skin, get ready to wiggle those piggies!
Big love,

Saturday, February 26, 2011

Vanilla Almond Pancakes with Vanilla Yogurt Sauce


Oh boy, once you taste these babies, you'll be in love. They are fab-u-lous.
I have this pancake recipe that I use way too much, usually once a week. This morning I awoke with a hankering for pancakes... but not just any ol' pancakes. I wanted something a little different. Something with a bit more flavor. I searched through the freezer for some frozen berries, but I couldn't find any (and what did I find this evening, but those berries), so I headed for the spice cabinet and chose vanilla (a frequent addition to my pancakes) and my pancake newbie- almond extract. While I was whipping up the batter, I realized it'd be a shame to drizzle boring maple syrup on these breakfast delights. Whipped cream would have been awfully tasty, but I'm trying to lose weight. I threw together a suuuuper vanilla yogurt sauce to top them off and WOW was that a good choice! 


Pancakes

Ingredients

  • 1 cup flour
  • 1 teaspoon salt
  • 1 teaspoon baking soda
  • 1 egg
  • 1 1/8 cups buttermilk (Don't have buttermilk? No problem! Use regular milk, for every cup of milk, add a tablespoon of white vinegar. Let it sit for 5 min. You can also use plain milk or your fave milk substitue- I've used soy and almond milk)
  • 2 tablespoons butter, melted
  • 1 teaspoon vanilla extract
  • 1 teaspoon almond extract

Directions

  1. Preheat and lightly grease a large skillet or electric griddle.
  2. Mix the flour, salt, and baking soda together in a bowl. Add the egg, buttermilk, both extracts, and butter; stir together lightly, but keep it lumpy. The batter should look thick, spongy, and puffy.
  3. Drop 1/3 cup of the batter onto the cooking surface, spreading lightly with the bottom of the cup. 
  4. Cook until lightly-browned on each side, 1 to 2 minutes per side.

Vanilla Yogurt Sauce

Ingredients

  • 1 cup plain Greek yogurt
  • 1 teaspoon vanilla extract
  • 1/2 cup powdered sugar

Directions

  1. Mix together yogurt and vanilla extract.
  2. Slowly stir in powdered sugar. Add more sugar if it's still too tangy for your taste buds.
And just in case you want to drool over these yummy treats a bit more, I'll leave you with a few more shots. 


The official taste tester. Hers had PB too and were a total hit!


Friday, February 18, 2011

Want some cash?


You have your chance of winning $110 cash via paypal on St. Patrick's Day, March 17th. I've teamed up with nine other bloggers to help give you one awesome prize. CASH! Who doesn't love cash? You have 84 possible entries for this contest and we have provided an easy form to submit your entries below.

*There are no mandatory entries, but the more entries you do, the greater your chance of winning! You must submit all your entries on the form below for them to count. Each blog will display the form in their post or a link to the form to make it easier to submit your entries.*

1. Follow Heather from Mommy Only Has Two Hands on GFC. You must leave her a comment on this post for your entry to count and you  must add your entry to the google documents form below. An easy way to find the post is to look for their Cash Prize Giveaway Button, click on it and it will link you to their post.  (1 Entry)

2. Follow Tiffany from Wyatt Family Farm on GFC. You must leave her a comment on this post for your entry to count
and you  must add your entry to the google documents form. (Must leave comment and fill out form, 1 Entry)

3. Follow Monique from Arms of A Sister on GFC. You must leave her a comment on this post for your entry to count and you must add your entry to the google documents form. (Must leave comment and fill out form, 1 Entry)

4. Follow Jennifer from  I'm Not Super Woman on GFC. You must leave her a comment on this post for your entry to count and you must add your entry to the google documents form. (Must leave comment and fill out form, 1 Entry)

5. Follow Ellie From A Little of This And A Little of That on GFC. You must leave her a comment on this post for your entry to count and you must add your entry to the google documents form. (Must leave comment and fill out form, 1 Entry)

6. Follow Jen & Meg  at Crafting in The Corners on GFC. You must leave her a comment on this post for your entry to count and you must add your entry to the google documents form. (Must leave comment and fill out form, 1 Entry)

7. Follow Jessica from Ramblings of A Stay At Home Mom on GFC. You must leave her a comment on this post for your entry to count and you must add your entry to the google documents form. (Must leave comment and fill out form, 1 Entry)

8. Follow Shari from One Grown Two to Go on GFC.  You must leave her a comment on this post for your entry to count and you must add your entry to the google documents form.  (Must leave comment and fill out form, 1 Entry)

9. Follow Julie from Sharing Savings With You on GFC. You must leave her a comment on this post for your entry to count and you must add your entry to the google documents form. (Must leave comment and fill out form, 1 Entry)

10. Follow Paola from Domestic Diva In The Making on GFC. You must leave her a comment on this post for your entry to count and you must add your entry to the google documents form. (Must leave comment and fill out form, 1 Entry)

11. Become a Member of MommyTLC and leave a comment on this blog post below saying you are a member and with what name you signed up with. We will confirm it with the owner of MommyTLC. (must fill out form below for entry to count, 1 entry)

12. (Worth 3 entries, fill form out each time for each entry.) Button to Display on Your blog!


$100 Cash!


13. You can tweet/facebook this giveaway up to 3 times per day. You can use the tweet this button at the top. (Must provide URL to tweet and enter it into the form each time)

14. You can blog about this giveaway (worth 5 entries, provide URL of post or page in entry form. Fill it out 5 times.)

Monday, February 14, 2011

We Have A Winner!

And the winner, thanks to Random.org is....


Manda! She won with this comment:


Congratulations! Hope you love your goodies from Beau Sophie!!

Tuesday, February 8, 2011

Giveaway Time!

This is a little something we've been talking about for a while and are SO pumped to finally share with you guys! We've got a treat for one of our lucky readers- we're hosting a giveaway for a $15 gift certificate to Beau Sophie, Jen's Etsy shop. Aren't you so excited?!


Here's how to enter:

1. Mandatory Entry Follow our blog! Leave a comment.

2. Visit Jen's Shop, Beau Sophiecome back and leave another comment telling us what you'd choose.

3. Like us on Facebook, come back and leave another comment telling us you did.

Each entry needs a separate comment. Giveaway will end Thursday, February 10th at 12:00pm. Winner will be chosen at random. Good luck!


Thank you for following our crafty adventures! We so appreciate our readers and are thrilled to share something with YOU.


Wednesday, February 2, 2011

Valentine's Day Garland


Our house wasn't really feeling the love for V-Day. I've never been one to decorate for holidays other than Christmas, but with a kiddo, I feel all decoratey! Also, I don't have money to spend on decorations. I started snooping around our house looking for a solution. This is what I found:

- Red paper
- Red ribbon
- White cardstock

I've seen a ton of adorable garlands floating around blogland, see here, here and here (super duper cute, aren't they?!). But, I aimed for simple.
I whipped out my 1in circle punch and cut a bunch out of the white cardstock. Took the red paper and drew hearts all over, then cut them out (Note: they do NOT have to be perfect. I love the look of wonky hearts!). I took a small hole punch and cut two holes in everything, to thread the ribbon through. Threaded everything onto the ribbon, tied a knot in each end and taped it to the mantle. Easy peasy and SO sweet!


Linking up to:
We Did It Wednesday @ Sew Much Ado
Whatever Goes Wednesday @ Someday Crafts
Valentine's Galore @ Someday Crafts

Wednesday, January 26, 2011

Off Her Rocker

We were passed down this sweet little rocking chair by my aunt. Apparently my cousin (now 15) had it when she was little, but nobody could remember where it came from or if it was something important, so it sat in her storage room. When it came to us, it was certainly a cute rocker, but it had a few pencil lines and was looking a bit sad.

Sad little rocker, begging for love.

I knew I could help it step up its' game (is that the right its'? I never know)! A few weeks ago, I popped over to Home Depot to check out their mis-tint paint. I snatched up this lovely shade of green for .50. What a steal! Here's the cutie-pie chair after a few coats of paint.

Ahhhh... that's better.

 I'm a sucker for the cottage-y distressed look. Plus, this little guy is going to be living in my daughter's room, which is super vintage inspired, so I had to make it fit in. I took my sanding paper and got to work. Then, to make the sanded parts pop even more, I brushed on some REALLY watered down brown paint. Wiped it all off (just want a little to stick to the raw wood) and voila!

Have a seat, won't you?
I'm ready for my close up!

Total cost: .50 for paint. That's my kinda project!


Linking up to:


Make it Yours @ My Backyard Eden

handmade projects

Monday, January 24, 2011

Creamy Broccoli Soup

I got this month's copy of Real Simple today. As I was reading through it (I swear, that magazine takes me forevah- there's so many awesome articles and tips!) , I stumbled across a recipe for Creamy Broccoli Soup that looked super yummy. The page was ripped out and hubby was sent out to the store for supplies!


Creamy Broccoli Soup

Serves 4Hands-On Time: 20m Total Time: 40m

Ingredients

  • 1 tablespoon olive oil
  • 1 medium onion, chopped
  • 1⁄8 teaspoon crushed red pepper (optional)
  • 2 cups low-sodium vegetable broth (I used chicken broth)
  • 1 bunch broccoli, florets roughly chopped and stems peeled and sliced (about 7 cups)
  • 1 large russet potato (about 8 ounces), peeled and cut into 1⁄2-inch pieces
  • kosher salt and black pepper
  • 2 ounces sharp white Cheddar, grated (1⁄2 cup) (I used Parm)
  • bagel chips, for serving (I made some Quick Herbed Beer Bread)

Directions

  1. Heat the oil in a large saucepan over medium heat. Add the onion and red pepper (if using) and cook, stirring occasionally, until the onion is soft, 4 to 6 minutes.
  2. Add the broth, broccoli, potato, 2 cups water, ½ teaspoon salt, and ¼ teaspoon black pepper to the saucepan and bring to a boil. Reduce heat and simmer, covered, until the vegetables are very tender, 18 to 20 minutes.
  3. In a blender, working in batches, puree the soup until smooth, adjusting the consistency with water as necessary. (Alternatively, use a handheld immersion blender in the saucepan.) Top with the Cheddar and bagel chips, if desired, before serving.
By Cyd McDowell,  February 2011


Saturday, January 22, 2011

Blueberry Dumplings with Whipped Cream

I was bored the other night, and trying to think of -something- to bake. I had a lot of heavy whipping cream left in my fridge that needed using and I have 30, yes, 30 pounds of frozen organic Maine blueberries in our freezer..so let's just say it had to be blueberry and I had to use my whipping cream, so I had a little thinking to do. A new challenge, I love it! I was sitting and talking to my Husband while sifting through ideas and having every recipe I came across or thought up shot down because I was lacking an ingredient...until a stroke of genius hit me..dumplings! I hunted for a recipe that was quick and easy..and I found one over at Paula Deen's website.
This recipe is to die for delicious. I wanted to just inhale the entire lot of them...however they are very rich.  They melt in your mouth, they make your eyes roll, and your taste buds overdose...and all from a very very easy recipe. Go Paula, she's one heck of a cook!
Here's the scoop on these mouth watering bite sized delights:


Servings: 8 servings
Prep Time: 10 min
Cook Time: 30 min
Difficulty: Easy

Ingredients 

Vanilla ice cream or fresh cream, for serving
2 cup water
1 quart fresh or frozen blueberries
1/4 cup milk
Pinch of salt
1/2 cup (1 stick) butter, softened
1 teaspoon baking powder
1 tablespoon sugar, plus 1 1/2 cups
1 cup all-purpose flour

Directions

Stir flour, the 1 tablespoon sugar, baking powder, and salt together in a bowl.  Cut butter into dry ingredients, using a pastry cutter or fork.  Add milk to form dough.  Mix berries, the 1 1/2 cups sugar, and water together in a saucepan and bring to a boil.  Drop dumplings into hot boiling berries by the tablespoonful.  Cover pot, reduce heat, and cook slowly for 20 to 30 minutes.  Do not remove lid before 20 minutes has passed. Do not stir dumplings. Serve with vanilla ice cream or fresh cream, I made my own whipped cream. Also, be *very* careful when taking out the dumplings, use a small kitchen spoon to take them out to plate them. Drizzle some blueberry juice over the plate, plop a bit of whipped cream and be ready to devour this amazing treat. 


Thursday, January 20, 2011

Apple Pie Egg Rolls

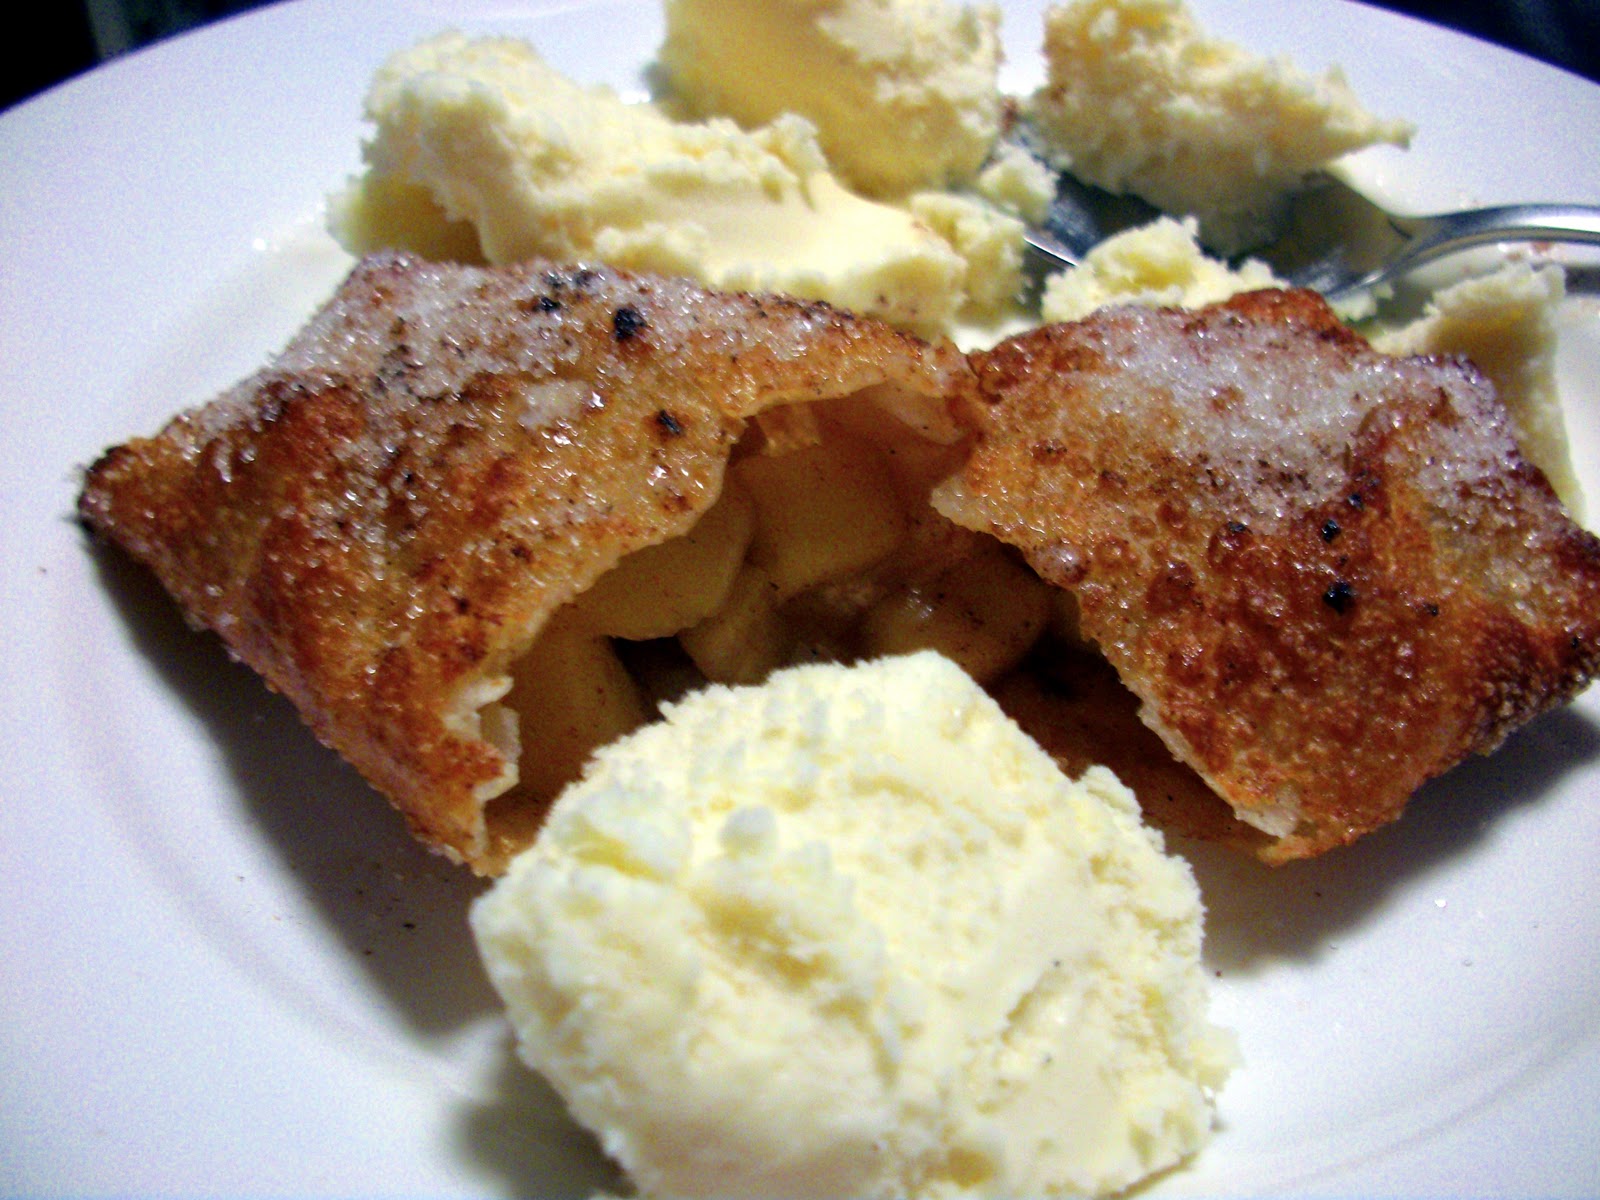
Apple Pie fried Egg Rolls! yum!

The name says is all. These treats are amazing, and fairly simple. I had been blog browsing a few weeks ago (like I do every day!) and came across this sweet little recipe over at Miss in the Kitchen's blog. I gasped and knew I *must* make these and many of them! So, I had a friend over one evening and we got to baking. Per usual with her, we put on the tacky music, danced around the kitchen and sang without abandon while we created these little delights. 
Here's the Recipe:

Apple Pie Egg Rolls
Ingredients:
1 tablespoon butter
3 cups apples, peeled, cored, and diced (I used Granny Smith)
1/4 cup brown sugar
1/2 teaspoon cinnamon
5 egg roll wrappers
vegetable oil for frying (Be careful!)
for garnish:
1 tablespoon sugar mixed with 1/4 teaspoon cinnamon
Cooking Directions:
In a medium size pan, melt butter, add apples, brown sugar, and cinnamon.  Cook over medium-high heat, stirring often until apples are tender.  Pour into a bowl and place in the refrigerator to cool, about 30 minutes. 
Place about 2 tablespoons of apple filling into each egg roll wrapper, wet edges of wrapper with water, roll up sealing edges.  Repeat with remaining ingredients.
Heat oil to about 350 degrees, add egg rolls two at a time, turning to cook all sides, remove to paper lined plate and sprinkle with cinnamon sugar. Repeat with remaining egg rolls.
Serve with vanilla ice cream and caramel sauce...or even a nice toffee sauce would be amazing!
Tips:
Do not take your egg roll wrappers out of the fridge until it is time to wrap them up, they will grow hard and break apart if you do. Be sure to wrap them tightly as well- when you're frying with oil if a bit seeps out it tends to crackle a bit more and could splash you. Also..be very careful as always when you're frying anything. The oil can burn and start a massive cloud of smoke in your kitchen, or worse a fire- very quickly. Just stay at the stove and be careful and you will be fine. I heated these little buddies in a large wok for ease...also the sides of the wok are very tall and prevent most of the oil from spitting at my forearms. If you've got a wok- use it. 
Enjoy!

Wednesday, January 19, 2011

English Sticky Toffee Pudding


I made this traditional British sweet treat last weekend (among another that will be posted, ASAP! I promise!) for a friend's birthday. It was a total surprise for her- I had no idea if she, or the other guests would even like this ..but it's worth a try and who doesn't LOVE toffee? I know I do.
I had been watching none other than The Food Network (If you know me at all, this is the ONLY station on in my house.) I saw this talked about on an episode of  "Diners, Drive-ins and Dives" I believe..don't quote me. 


Anyway..so here's the skinny on this super rich, super jaw dropping dessert- get ready to wow your friends with the intense rich flavors!

Ingredients

  • 1 cup plus 1 tablespoon all-purpose flour
  • 1 teaspoon baking powder
  • 3/4 cup pitted dates
  • 1 1/4 cups boiling water
  • 1 teaspoon baking soda
  • 1/4 cup unsalted butter, softened
  • 3/4 cup granulated sugar
  • 1 large egg, lightly beaten
  • 1 teaspoon vanilla

TOFFEE SAUCE:

  • 1/2 cup unsalted butter
  • 1/2 cup heavy cream
  • 1 cup packed light brown sugar
  • 1 cup heavy cream, whipped

I made my own Whipped Cream:
1 cup heavy whipping cream
About 1 tablespoon of vanilla extract ( I didn't measure, just start low and add to taste)
1/2 Cup of Granulated Sugar

Directions

Preheat oven to 350 degrees. Butter a 10-inch round or square baking dish. Sift the flour and baking powder onto a sheet of waxed paper. Chop the dates fine. Place in a small bowl and add the boiling water and baking soda; set aside. In a bowl of electric mixer beat the butter and sugar until light and fluffy. Add the egg and vanilla; beat until blended. Gradually beat in the flour mixture. Add the date mixture to the batter and fold until blended with a rubber spatula. Pour into the prepared baking dish. Bake until pudding is set and firm on top, about 35 minutes. Remove from oven to a wire rack. Toffee Sauce: Combine the butter, heavy cream and brown sugar in a small heavy saucepan; heat to boiling, stirring constantly. Boil gently over medium low heat until mixture is thickened, about 8 minutes. Preheat broiler. Spoon about 1/3 cup of the sauce over the pudding. Spread evenly on top. Place pudding under the broiler until the topping is bubbly, about 1 minute. Serve immediately spooned into dessert bowls. Drizzle with toffee sauce and top with a spoonful of whipped cream.


This is a VERY rich dessert and makes a ton. I also just baked it in a 9x13 Pyrex glass baking dish. The moans, groans and finger marks left in the whipped cream, and the toffee sauce was a sign it was pure success!


Enjoy! Let me know if you enjoy this as much as I do!

 
Related Posts Plugin for WordPress, Blogger...